Powerful Exposure tools on iPhone!
Blown-out skies… crushed shadows… You can fix all of it right on your iPhone. In this guide, we’re diving into the Blackmagic Camera App’s most powerful exposure tools — so you can see problems before you ever hit record.
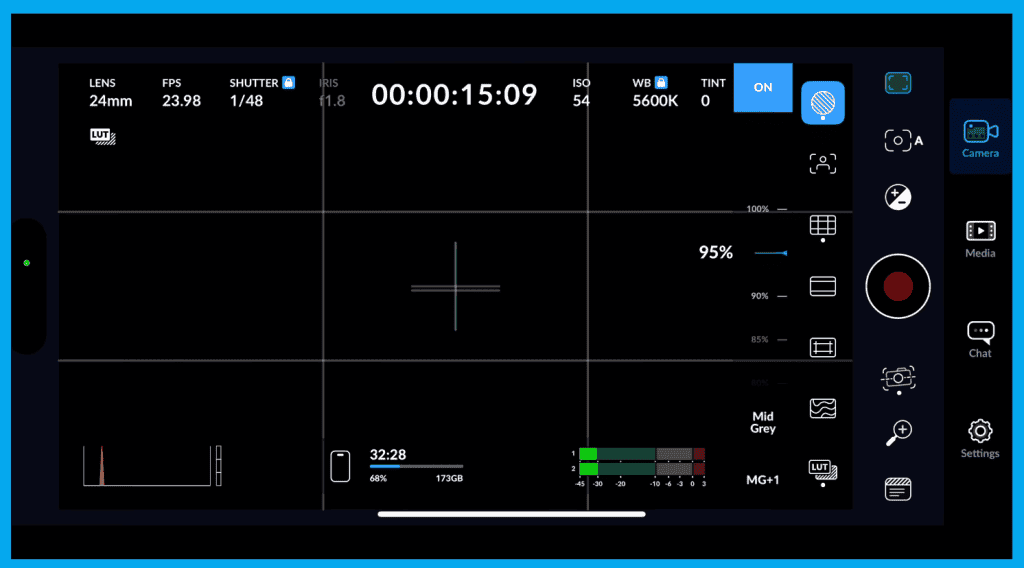
Zebra Stripes – Protect Your Highlights
When enabled, diagonal stripes appear over the brightest areas of the frame.
They’re based on IRE levels — a scale from 0 (black) to 100 (white).
Other Modes available:
| Zebra Mode | IRE Target | Best Use |
|---|---|---|
| Mid-Gray (40 IRE) | Subject exposure | Gray cards & skin tones |
| MG +1 (50–55 IRE) | Safer midtones | Slight highlight protection |
✔ Fast, reliable exposure
✔ Prevents clipping on bright areas
Focus Peaking – Sharp Focus Every Time

Colored outlines (green/red/blue) appear around the sharpest edges in the image.
Great for:
- Eyes + facial features
- Text + product shots
- Manual focus + log shooting
Grid Overlays – Composition Like a Filmmaker

| Overlay | Purpose |
|---|---|
| Rule of Thirds | Balanced compositions, great for interviews |
| Center Cross | Clean symmetry + straight horizons |
| Crosshair | Pinpoint product framing |
| Dot Center | Minimal alignment reference |
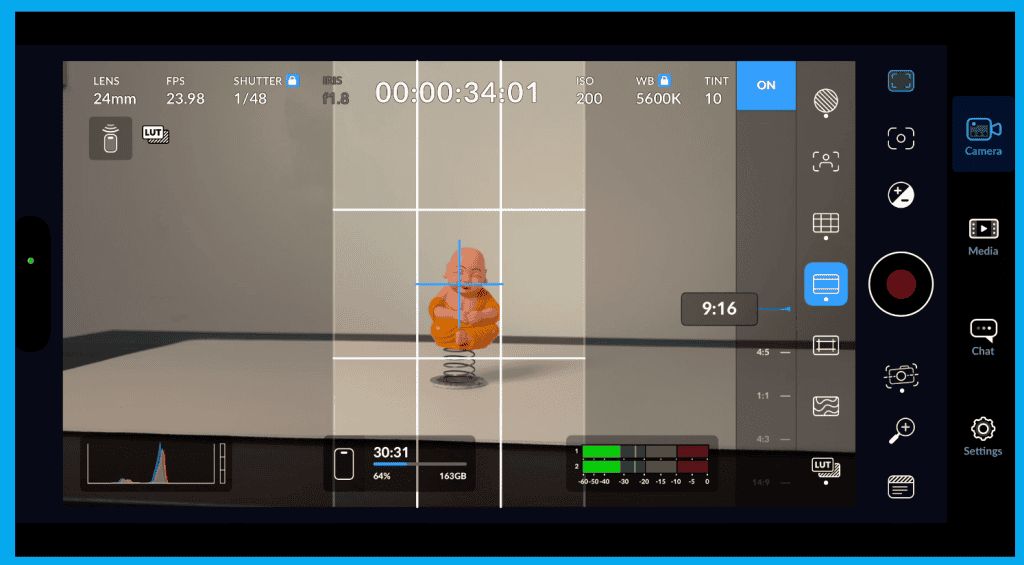
Plus safe area framing for:
- 1:1 (Instagram square)
- 2:1 widescreen
- 2.35:1 cinematic letterbox
- 9:16 vertical mobile content
False Color – The Pro Exposure Secret
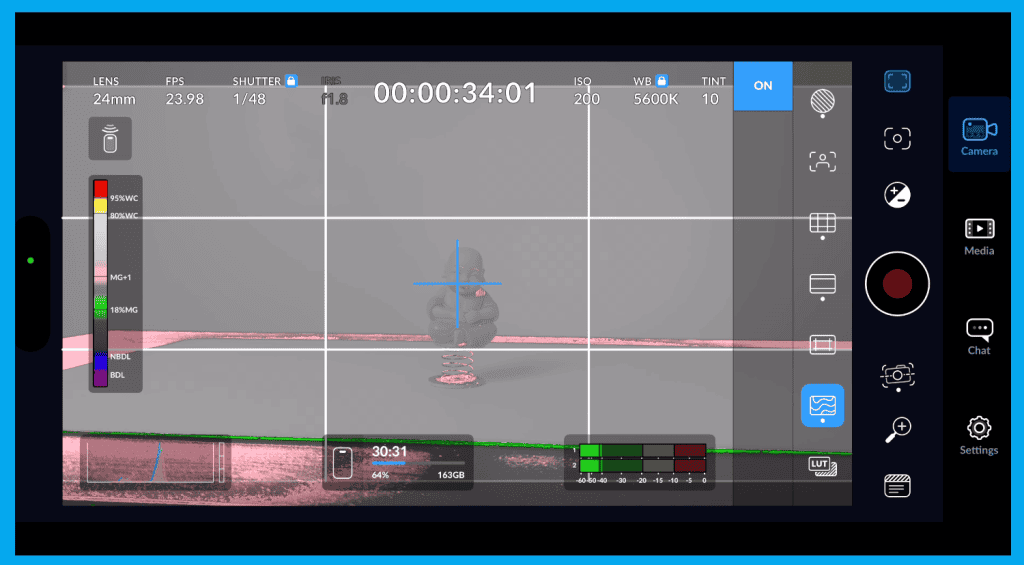
False color turns your image into a color-coded exposure map. Each color represents an exact IRE brightness zone.
| Color | Meaning | IRE | What To Adjust |
|---|---|---|---|
| Green | Perfect mids/skin | ~40–50 | Ideal exposure |
| Pink/Magenta | Soft highlights | ~60–70 | Slightly bright skin |
| Yellow | Near-clip highlights | ~90–95 | Reduce exposure |
| Red | OVEREXPOSED | 100+ | Highlights gone |
| Blue | Shaded tones | ~20 | Lift shadows |
| Purple | Crushed blacks | 0–10 | Raise exposure |
Why pros rely on it:
- Consistent exposure
- Protected skin tones
- Faster log color grading
- Technical accuracy
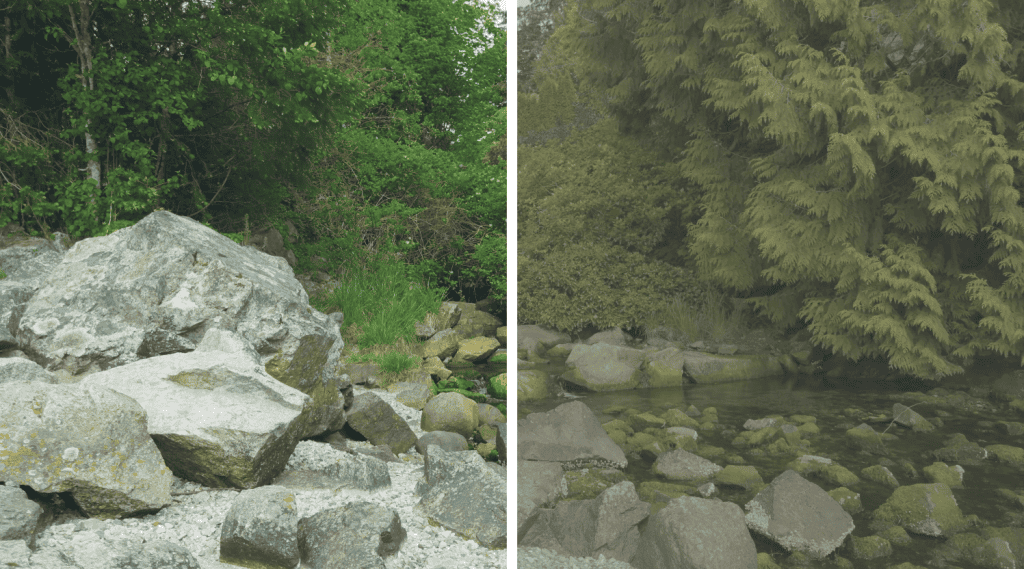
LUT Preview – Film Look While Shooting

The LUT preview button applies a temporary film look — only for your preview, not the recording.
Benefits:
- See the creative look before post-production
- More accurate exposure + lighting decisions
- Helps clients visualize the final image
Monitor Settings
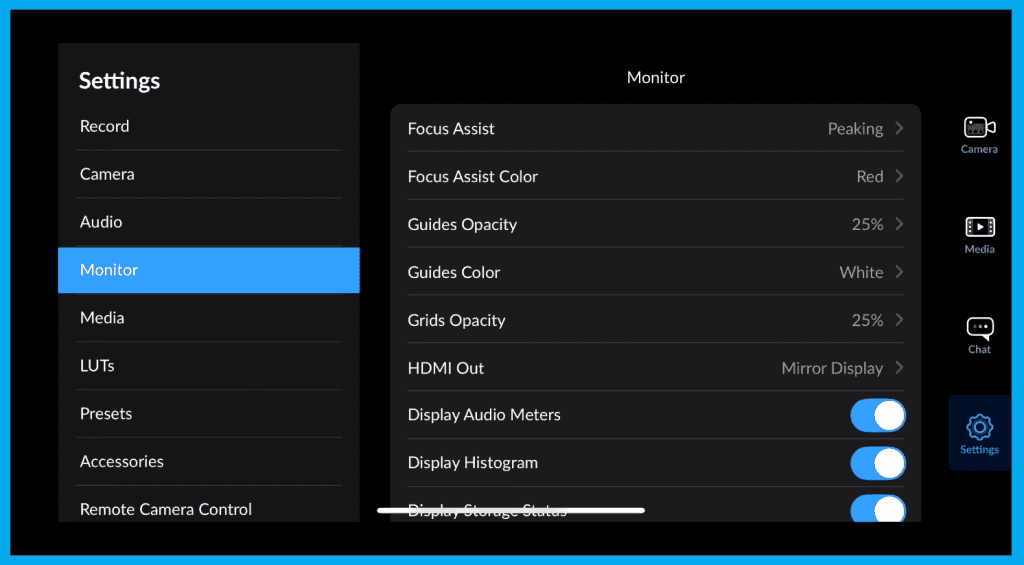
Focus Assist Settings
wo options enhance edge clarity:
- Peaking – highlights fine detail
- Colored Lines – higher contrast overlay for tough focus situations
Adjust overlay color based on scene:
- Red or green stands out best on skin tones
Customizing On-Screen Guides
Control:
- Guide opacity
- Guide color
- Grid visibility for bright outdoor scenes
These overlay tools = purely visual → They never affect your recorded footage.
External Monitoring via HDMI
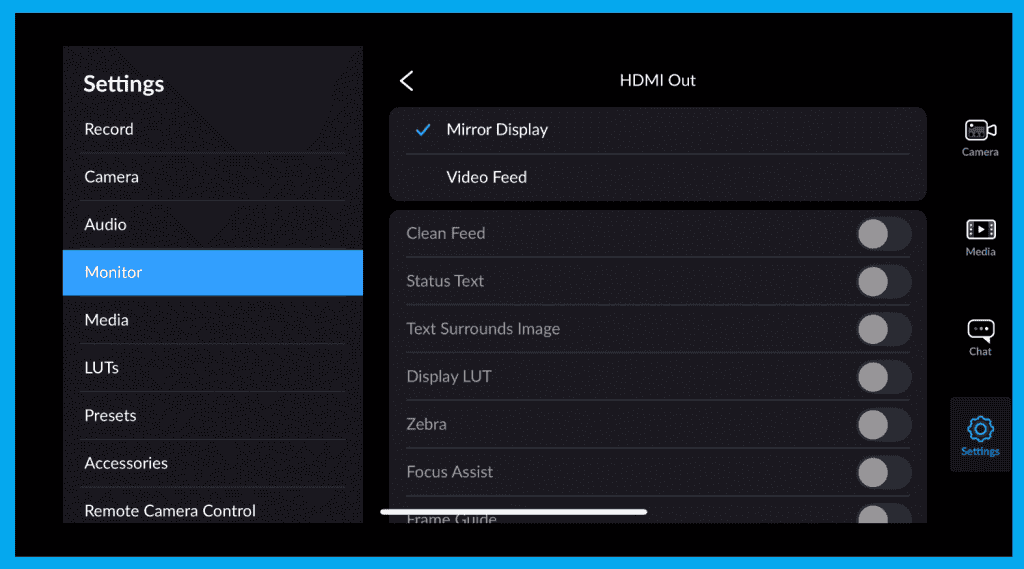
You choose what your monitor displays:
| Output | What It Shows | Best Use |
|---|---|---|
| Monitor Display | Image + overlays + buttons | Crew + setup monitor |
| Video Feed | Clean image only | Client preview / external recording |
Optional overlays to toggle on the monitor:
- Audio meters
- Histogram
- Storage status
- Upload progress
- Battery indicator
Final Thoughts
Now that you can dial in perfect exposure fast, with these powerful exposure tools you’re ready for the next skill: Manual focus + cinematic rack focusing.